When you apply the railing tool to a stair, the railing conveniently appears in the landing as well as the runs such as in the following image:
But what happens if your stairs have a wall supporting the landing, for example, or any other design situation where you need to interrupt the railing:
 |
| Deliver this and you'll lose the job!!! |
The first thing one will attempt being the most logical is to edit the railing sketch and delete the undesired railing bit, unfortunately this is the return you get:
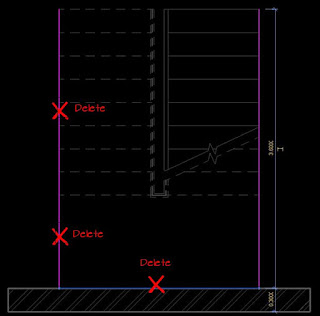
Now try this. Edit the railing sketch and delete the landing and the second ramp lines so that you end up with only two railing CONTINUOUS segments (first run and landing):
 |
| Landing and 2nd run deleted |
Now manually trace (Architecture<Railing<Sketch path) railings for the second landing and the second run. Make sure they are TWO sketch lines.
You'll see the new railings are built on the current work plane, in this case on the floor.
Now it's time to mount the rails over the staircase. Select the rail, choose the "Pick New Host" tool and select the stair as the new host.
 |
| Mission accomplished |


Could you please tell me what settings you used to render stairs?
ReplyDeleteThanks
It's just the Realistic visual mode integrated in Revit. Shadows on.
DeleteI wanted to thank you for this great read!! I definitely enjoying every little bit of it I have you bookmarked to check out new stuff you post.
ReplyDeleteIron Ornamental Metalworks calgary