Editing the profile of a straight wall is a well-known and straightforward procedure in Revit. But how about editing the profile of a curved wall?
 |
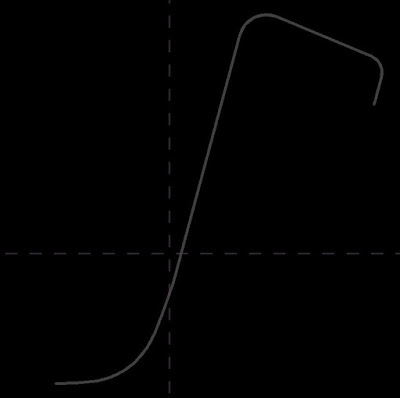
| Need to do this in Revit!!! |
In one project I had to achieve what is shown in the previous image, I needed a top-curved profile in a wall formed with several straight and curved segments. In this post I will share how I managed to do it. There might be other ways and and if you have a better solution please share it here through the comments, provide a link to a file, to another blog, etc etc.
Ok first of all I started a mass family and traced the wall's footprint with a simple model line in the mass environment.
 |
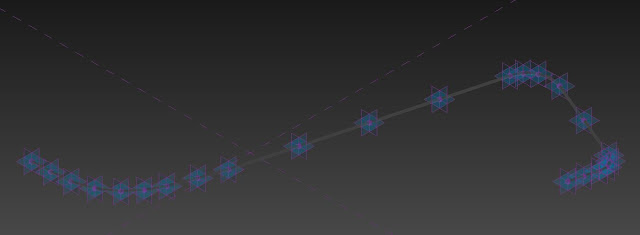
| Line segments traced in mass environment |
Next I placed reference points along the model line. You can use the divide tool and then place each point on top of the equidistant dividing points. In my case I preferred to place points at the ends and middle of each line segment.
 |
| Reference points at line |
Next select all the points, copy (CTRL+C), paste aligned to same place. Revit will warn you there are identical instances in the same place. That's ok. All new points are already selected so don't click again, just go to the properties pallette and specify a height offset for them.
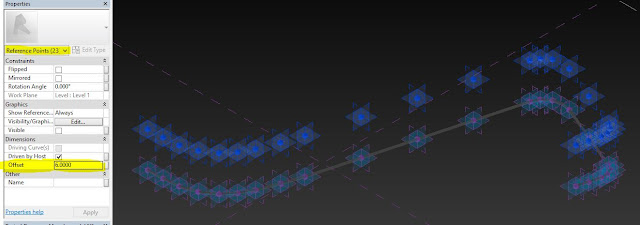 |
| Specify a height offset for new points copied |
Now trace vertical lines from one point to another. Choose "Model Line" and SET THE WORK PLANE at one of the vertical planes of the top reference point. Do start at the top point, not the bottom because this one will be our "grip" to control the shape later on.
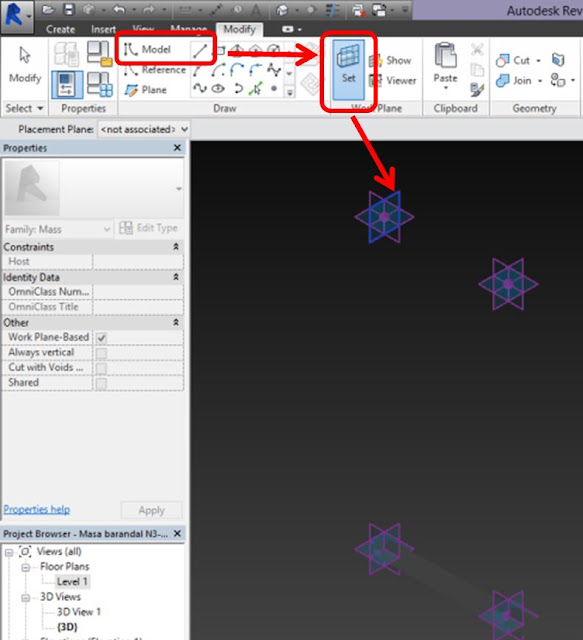 |
| Set work plane at one vertical plane of the top reference point |
Trace the vertical line from the top to the bottom reference points.
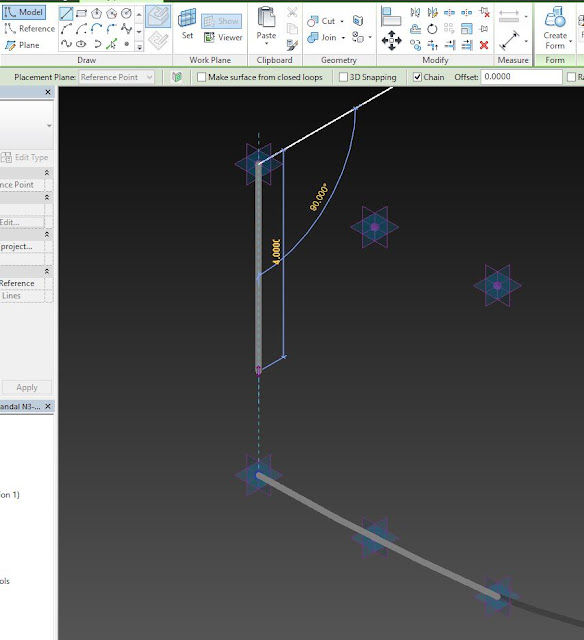 |
| Trace vertical line from top to bottom |
Repeat through all other points. Make sure you SET THE WORK PLANE AT EACH ONE OF THE TOP POINTS before tracing the vertical lines.
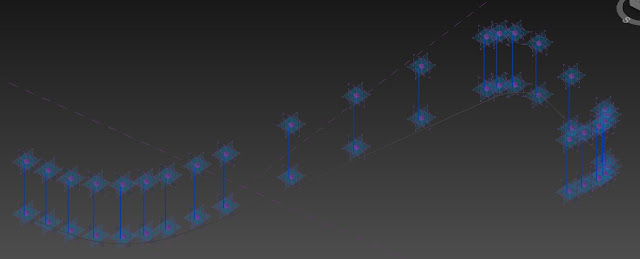 |
| Vertical lines complete |
It's time to create the surface. I would have loved to do it in one step, but unfortunately I got unpredictable results. Instead I chose to create individual forms based on each one of the horizontal line segments.
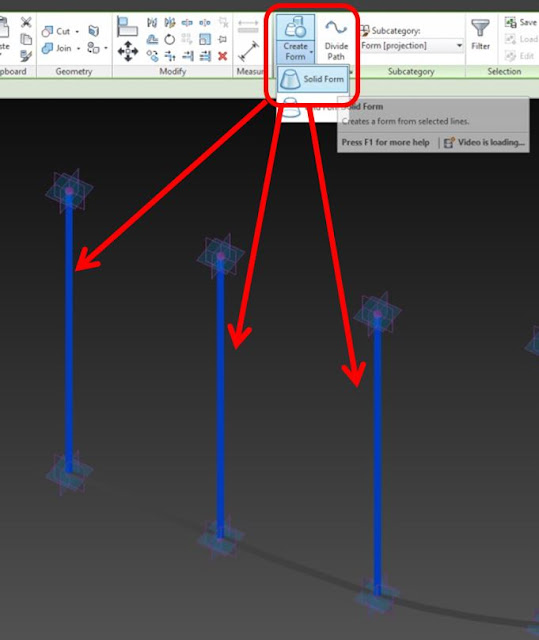 |
| Create form from the vertical lines only. Not the horizontal outline. |
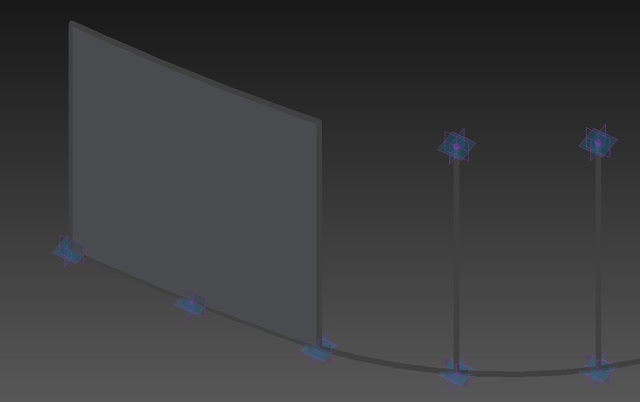 |
| First surface created |
If you have to divide the whole surface into several just as me, be sure to pick the edge of the previous form as well for the next form:
 |
| Surface completed |
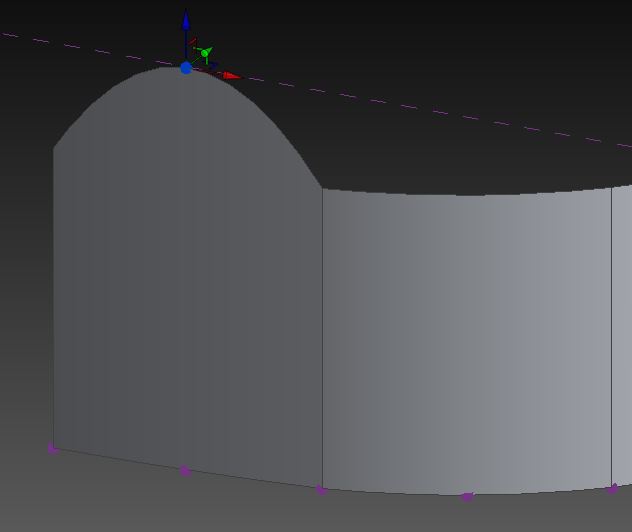
Once the surface is completed it's time to move the grips given by the top reference points. Remember you not only can drag them, but in your 3d view you can swith to front-back views and move them with specific precise distances by keyboard input.
 |
| Select point |
 |
| Then move it |
Note that the form being edited will result in a curved profile. That's because the form is based on vertical lines. If you need a profile with straight angled edges, then you need to create the form based on horizontal lines, or a SWEEP. But that's another story.
 |
| ALL POINTS MOVED |
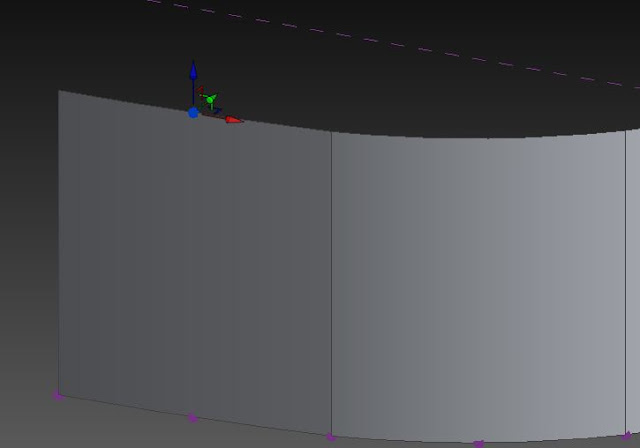
Now load the mass into a project and apply the "Wall by Face" tool. Once done, hide the mass and you get what´s shown in the first picture of this post.
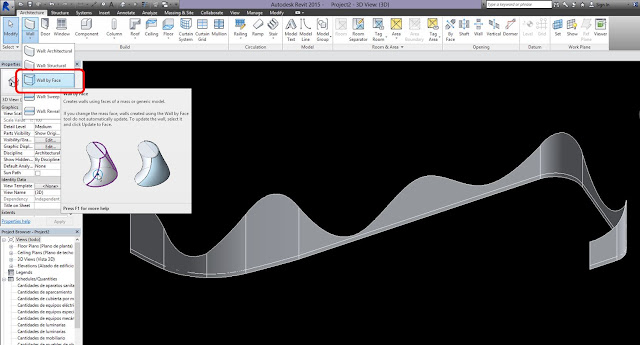 |
| Wall by face tool in the project environment |
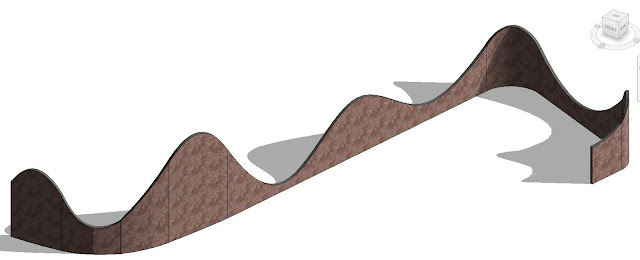 |
| Mission accomplished!! |
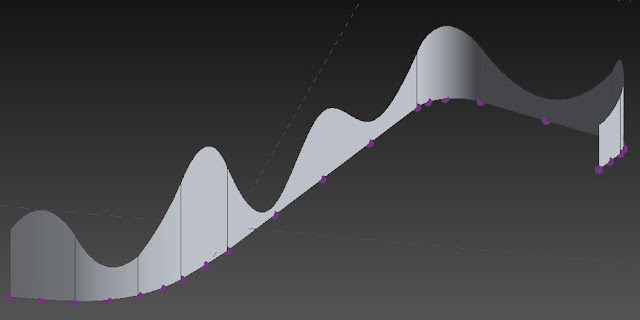
If you need a crazier shape, always remember the grip points can also move in other directions!! Try this:
Reload the mass into the project to update it, choose the wall and click on "Update to Face". This is the wall you get:
EDIT: visit Revit IQ blog to find another couple of ways to edit a curved wall profile here:
https://revitiq.com/edit-profile-of-curved-wall-in-revit/


This is nice, thanks. By adding the points along the model lines is this the same as an adaptive family? Could this have been created from an Adaptive Family template?
ReplyDeleteI haven't tried it. Perhaps you can make the attempt and tell us here what happened.
DeleteI was going crazy trying to figure out to get a curved surface in the x and y plane as well as curved in plan view. This tutorial gave me a base to pick edges for a sweep. Greatly appreciated!!
ReplyDeletePlease I need steps I m not understanding
ReplyDeleteOluchi, I just posted about 10 steps. It's better if you tell me which step did you not understand
DeleteHow do you have the bottom of the wall straight? For me, when I move the points up and down, the bottom line moves too, and it follows the top shape.
ReplyDeleteOk I see what you mean. I just did this exercise all over again. Once the form is created, If you select the vertical lines, when moving the grip will move both top and bottom boundaries. You need to select only the top reference point and then drag it. If top reference points have dissapeared after creating the form, simply select each form, select "X-RAY" on the top menu, and all points will be visible now. That will make it easier for you to move only the top reference points.
Delete